QuickBooks Online Integration
How to Create QuickBooks Invoices from Jira Time in Clerk
How to Set Products and Services for QuickBooks Invoices in Clerk
How to Set Taxes for QuickBooks Invoices in Clerk
How to Export Invoice Time Reports to QuickBooks in Clerk🍿 Related Video Tutorials
QuickBooks Online integration is used by the Clerk Invoices app.
If you use QuickBooks Online, you can connect it to Clerk Invoices to enable the following features:
- See all your QuickBooks customers in Clerk. In Clerk, customers are called clients. You could work with them like with regular Clerk clients — create invoices and invoice templates, see reports, etc. Renaming and deleting for QuickBooks clients will be disabled. They will have a small green QuickBooks badge. QuickBooks clients are updated in Clerk in real-time when you change them in QuickBooks.
- Sync all invoices from Clerk to QuickBooks. Clerk Invoices supports automatic and manual sync. With automatic sync, every created or updated invoice will be automatically created or updated in the connected QuickBooks company. If you enable manual sync mode, you can manually sync any invoice using the Export menu of a specific invoice. Sync works for invoices that belong to QuickBooks clients only. In the current version, this is a one-way sync from Clerk Invoices to QuickBooks. Clerk Invoices uses automatic sync mode by default.
Enabling QuickBooks Online Integration
Enabling QuickBooks Online integration requires just a few clicks! Go to Settings ▸ Integrations, click Connect QuickBooks Online button, and follow the onscreen instructions.
Every exported invoice in QuickBooks will have a link to the corresponding invoice in Clerk in the “Message on statement” field, that is not visible to the client.
Setting QuickBooks Products and Services for Invoice Items
In QuickBooks Online, every invoice item should be connected to a product or service. To set a QuickBooks product or service for an invoice item in Clerk, just put its name at the beginning of the invoice item description in square brackets. The product or service name should be written exactly as it is written in QuickBooks. Clerk will automatically search for the corresponding QuickBooks product or service by its name and set it for every invoice item. If a corresponding product or service is found in QuickBooks, its code in square brackets will be removed from the invoice item description. If a product or service cannot be found, the QuickBooks default one will be applied.
For example, if we have the “Hours” service for time and materials work and the “Compensation” product for covering the team’s business trip expenses, the invoice in Clerk could look like this:
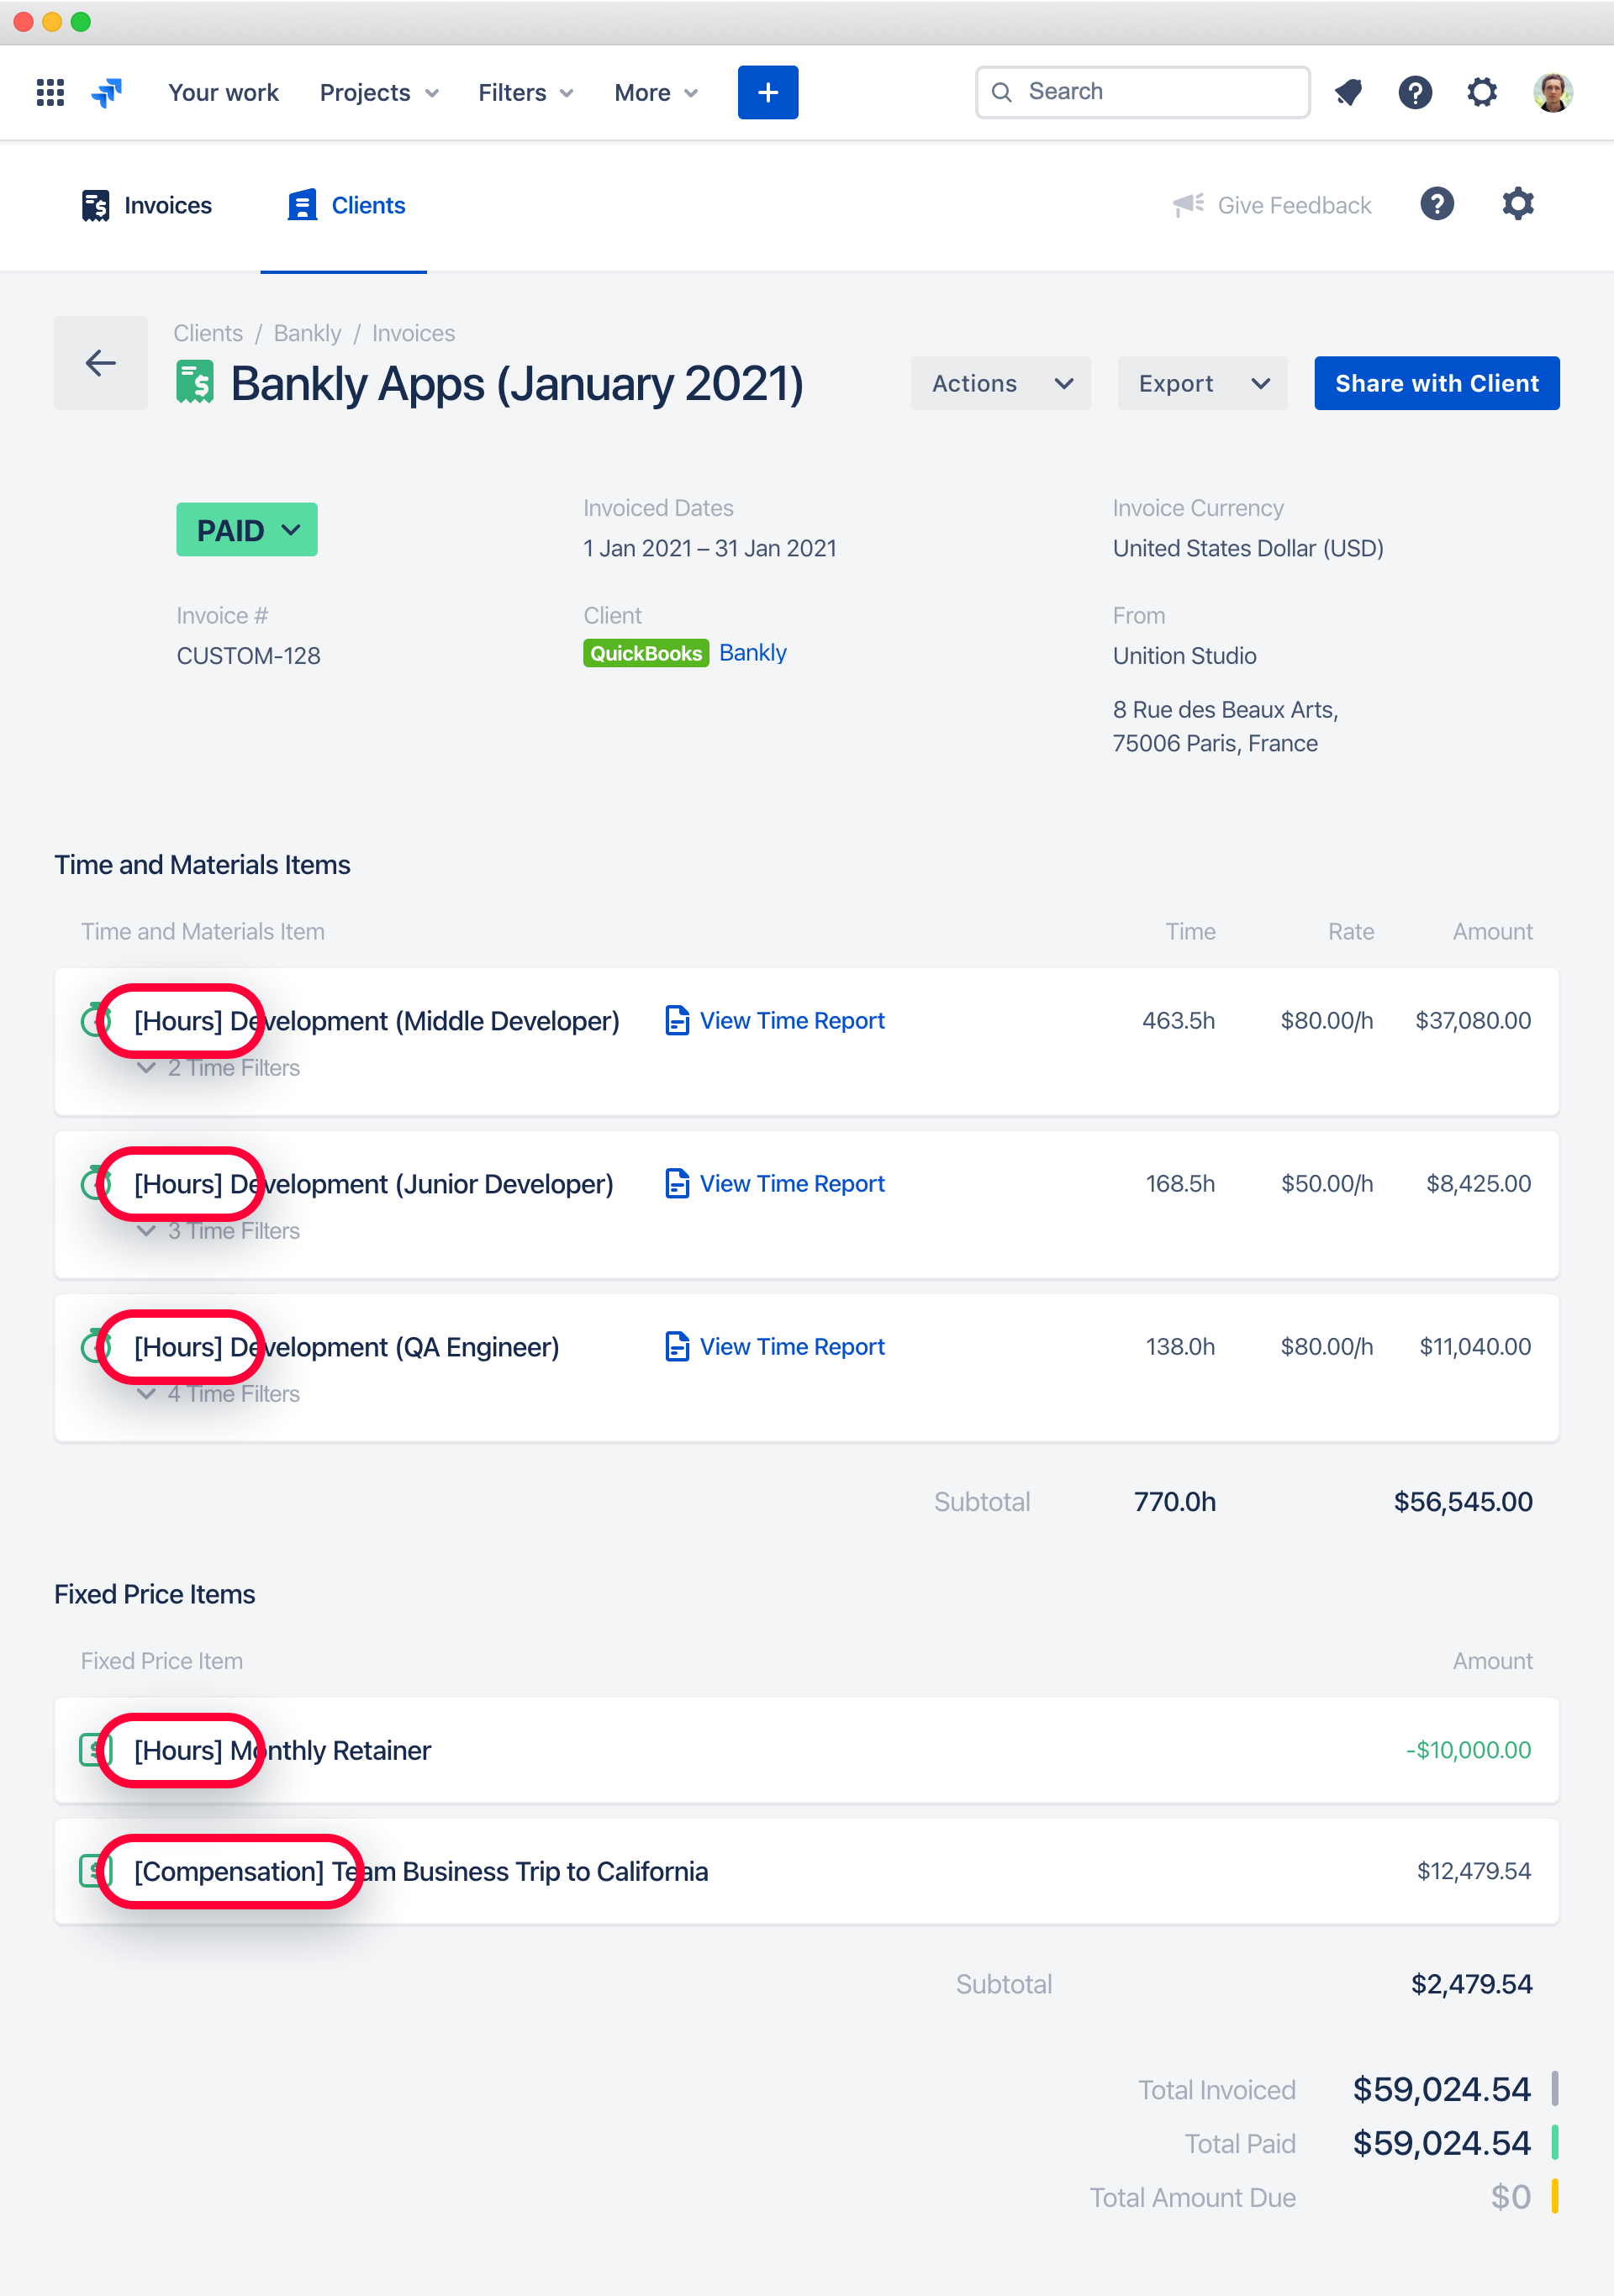
And the corresponding invoice in QuickBooks will look like this:

Setting Products and Services Depending on The Role in Clerk
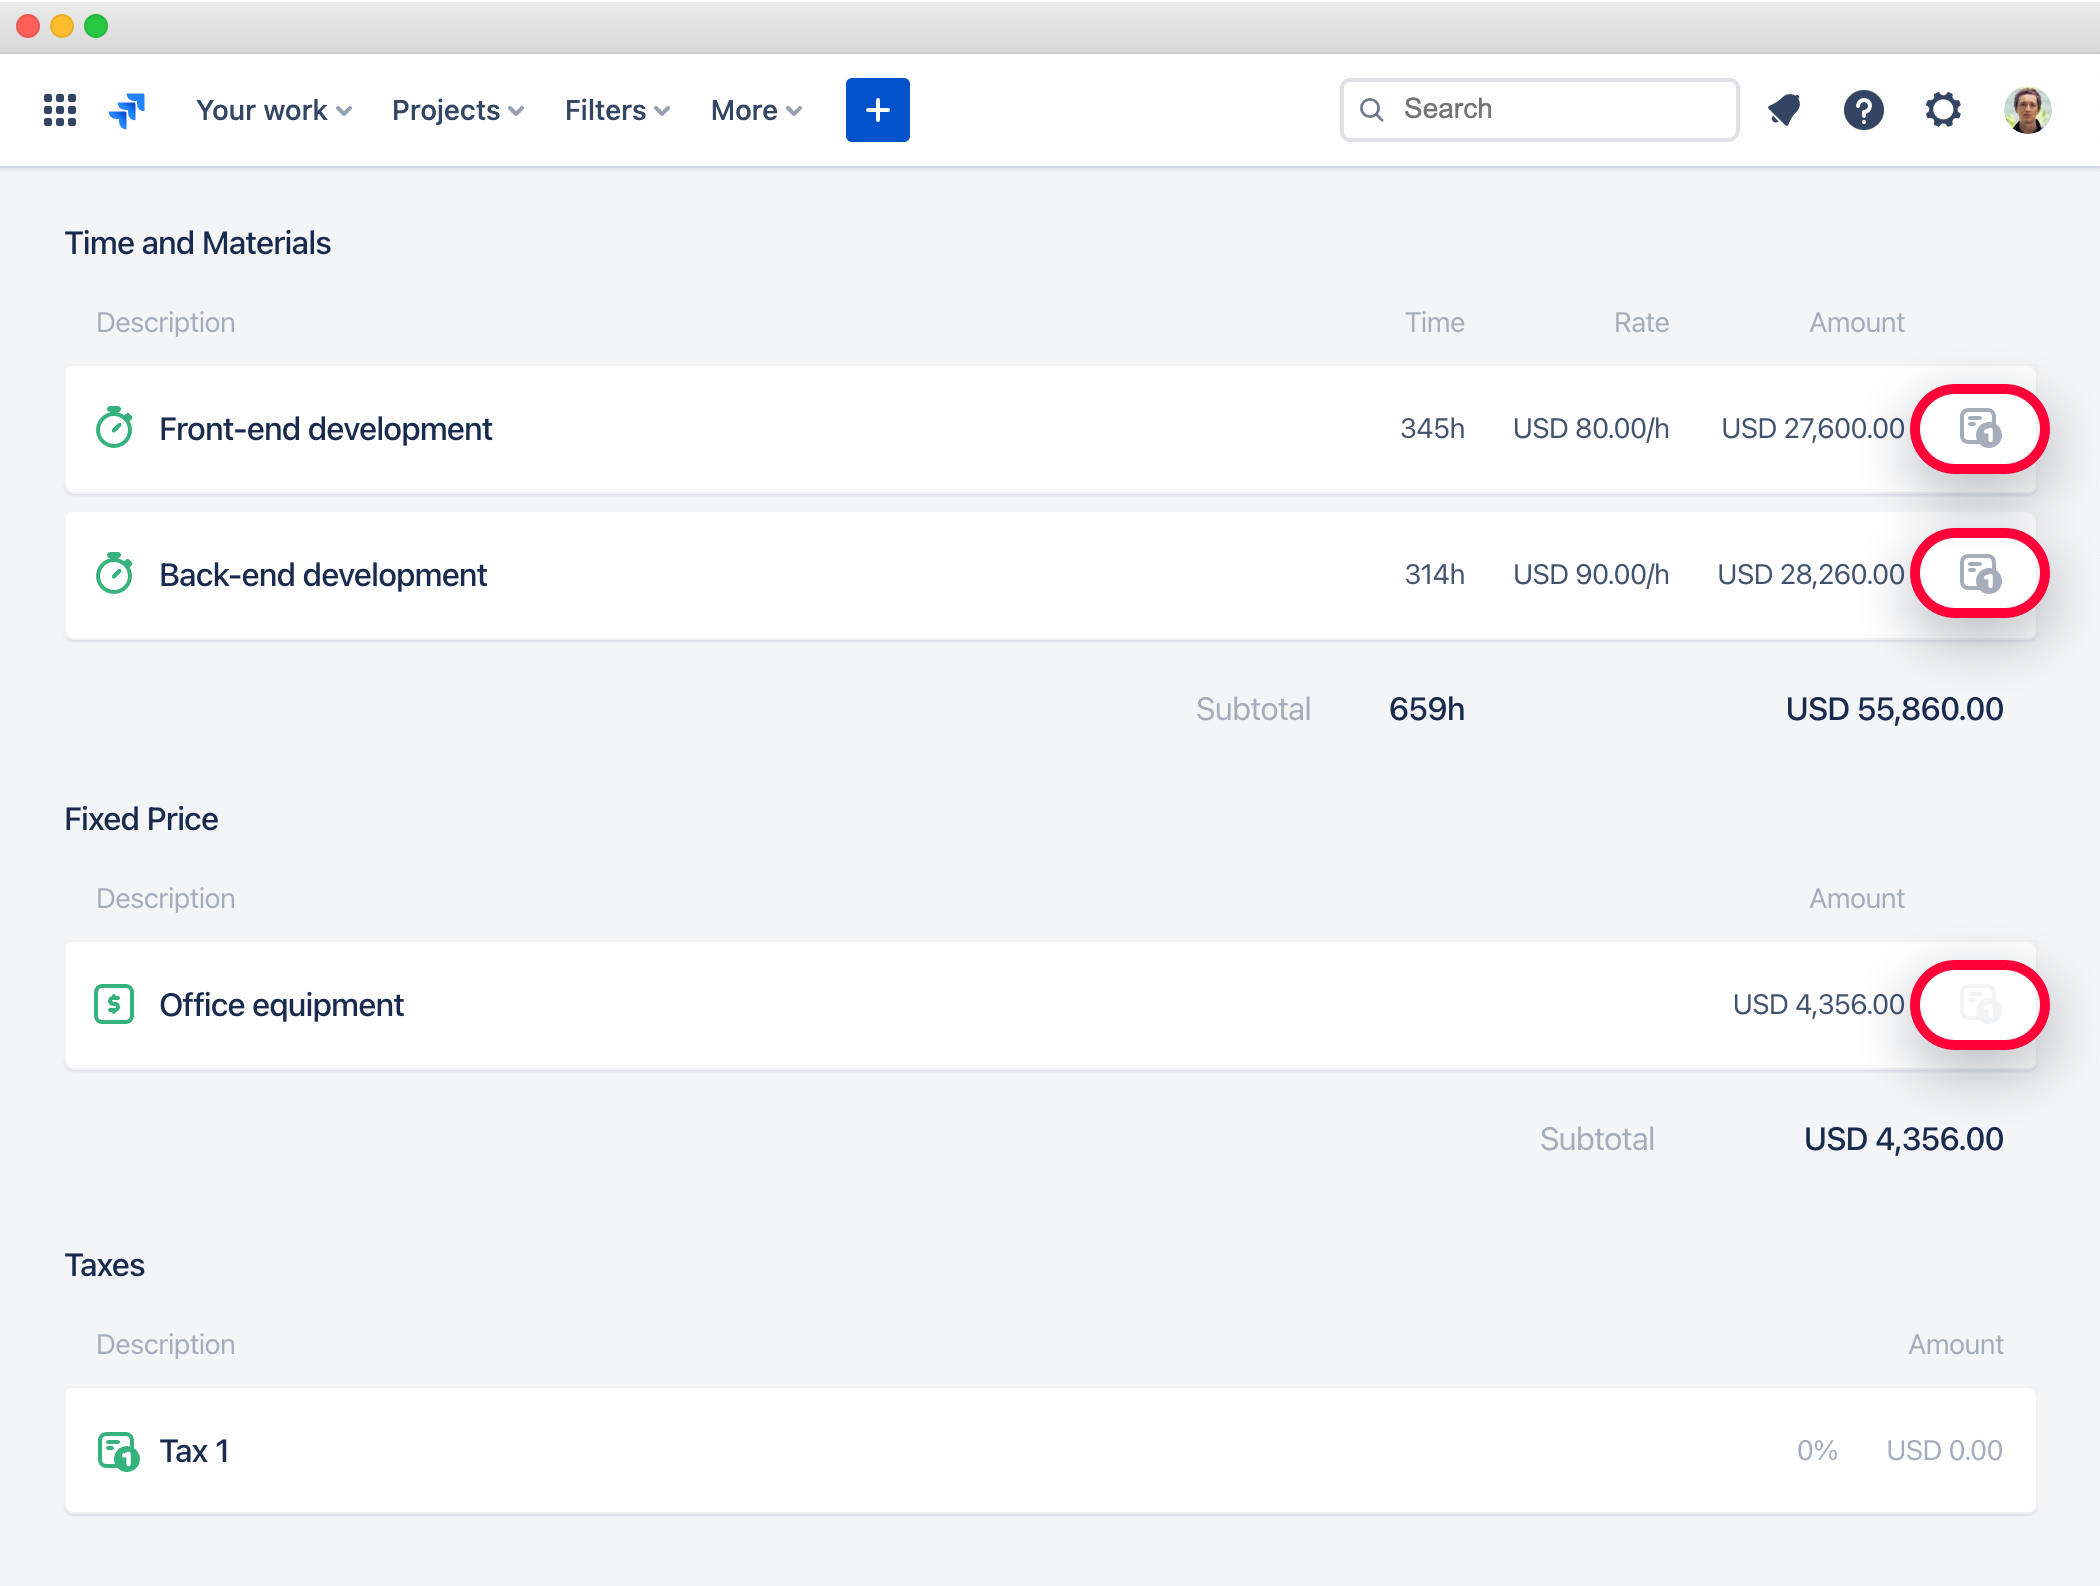
If you use the Invoice Generator to build invoices, you can set individual QuickBooks product or service for each invoice line depending on the role of that line. Here is how to do that:
- Put each QuickBooks product or service name in the corresponding role description in Clerk.
- Put the {{Role Description}} variable inside square brackets in the line description of the invoice template.
- When the invoice is generated, it will have lines with correct product or service names put in square brackets for each invoice line. Each product or service name will be taken from a corresponding role description.
- Clerk will apply the same logic as described before for setting a product or service for each invoice line in QuickBooks.
Applying Taxes
Taxes work differently in the US and non-US editions of QuickBooks. So, Clerk Invoices works with taxes in a different way depending on the QuickBooks edition.
US Edition of QuickBooks
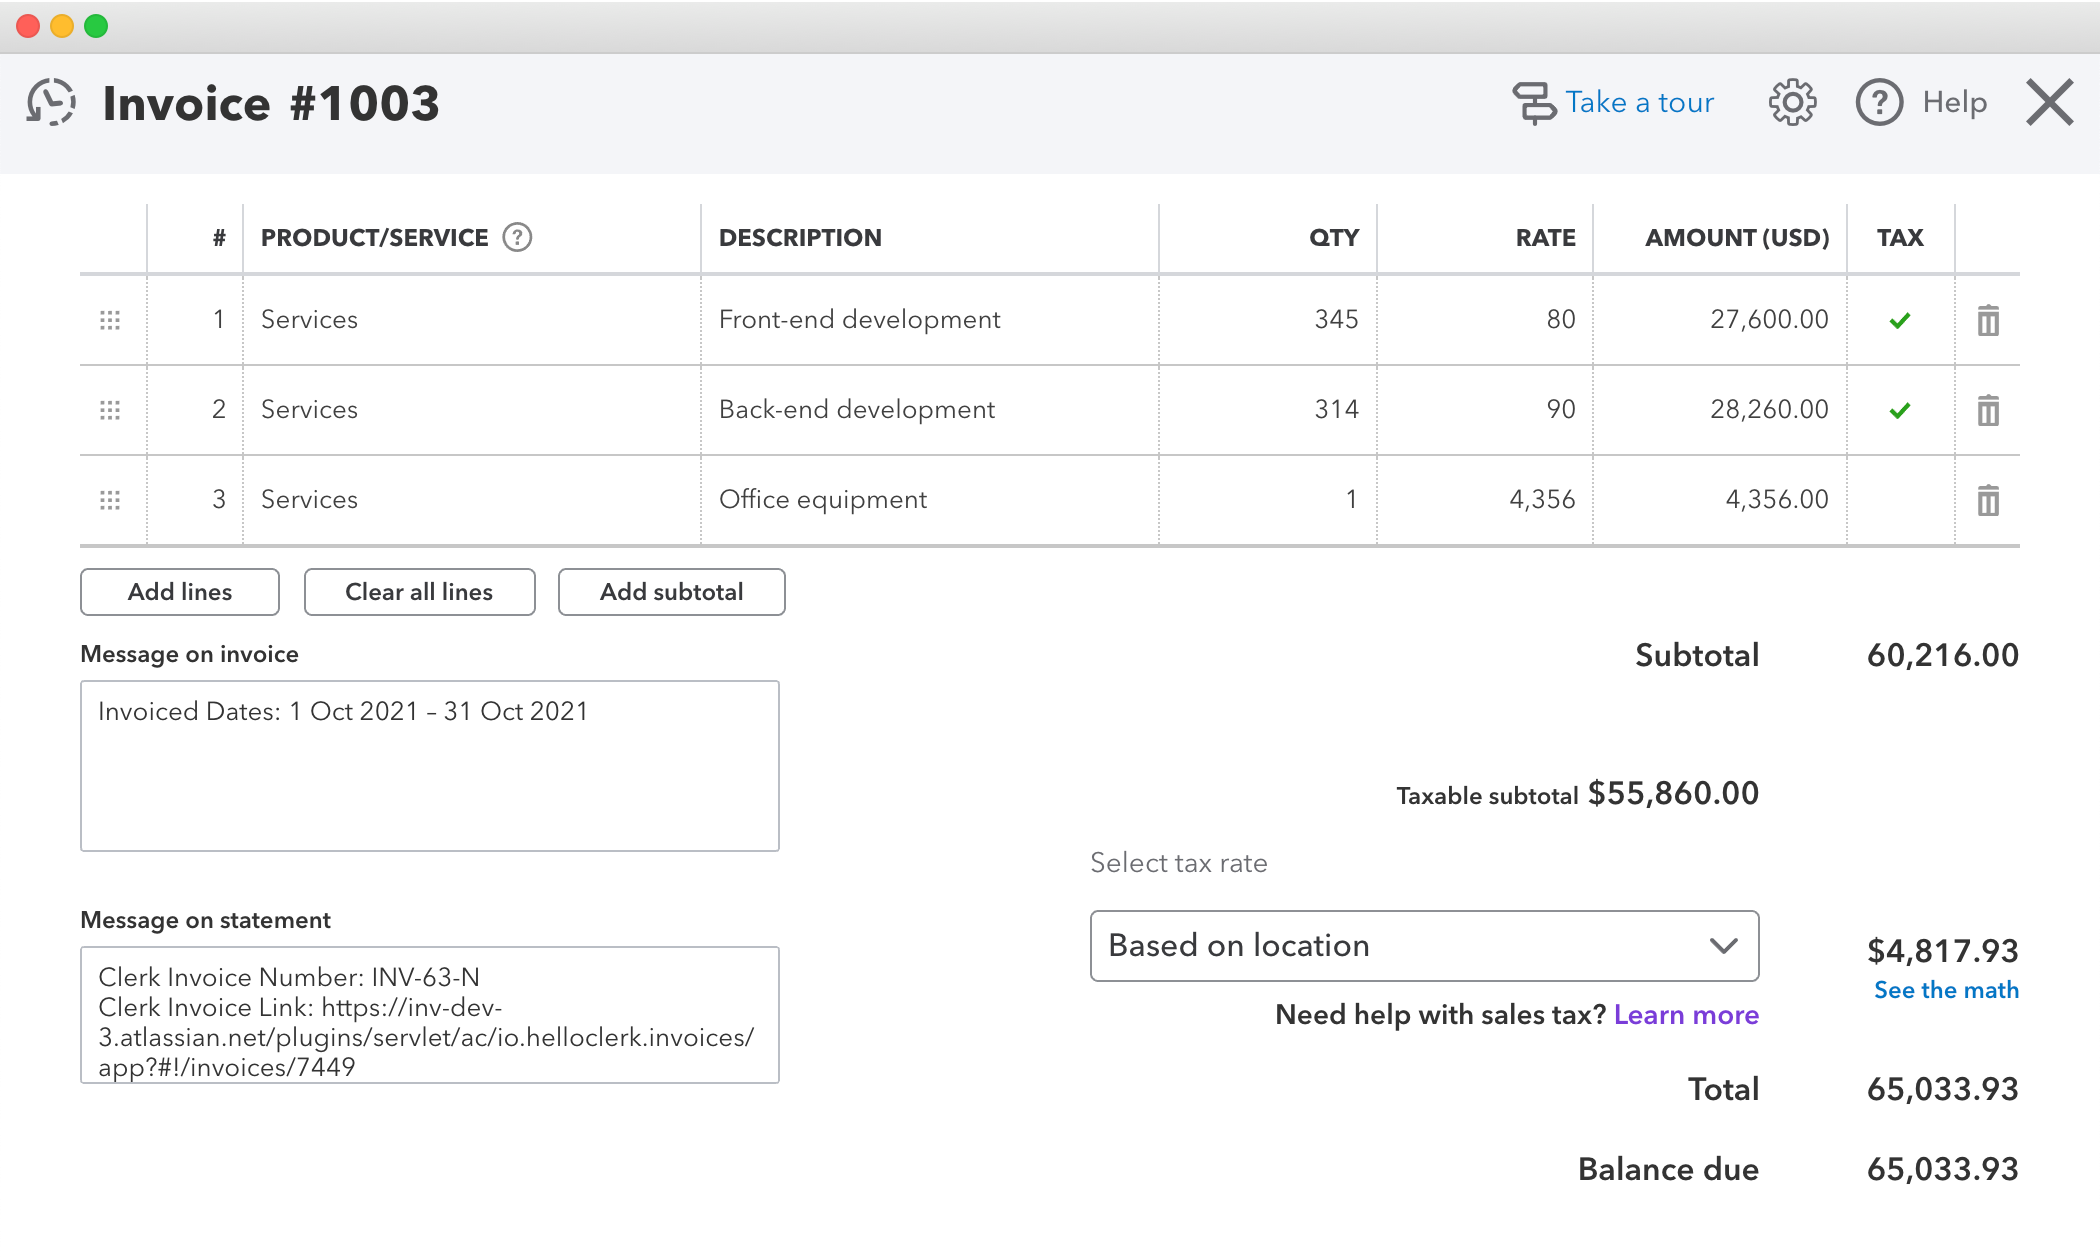
In the US edition of QuickBooks, taxes are assigned automatically depending on the customer’s location. In this case, QuickBooks allows only specifying if tax is enabled or disabled for each invoice line.
To enable or disable tax for each invoice line, please follow these steps:
- Add tax to the invoice in Clerk, you can leave description and tax rate blank, since they will not be exported to QuickBooks
- Enable or disable Tax 1 for each invoice line in Clerk
- Tax 1 option will define if that line will be taxable in the exported invoice in QuickBooks
This is an example of a Clerk invoice:
And this is the same invoice exported to the US edition of QuickBooks:
Non-US Edition of QuickBooks
You can specify individual tax for each invoice line in the Non-US edition of QuickBooks. To do that, please put the exact tax name in square brackets at the end of the description of each invoice item in Clerk:

The same invoice exported to the non-US edition of QuickBooks will look like this:
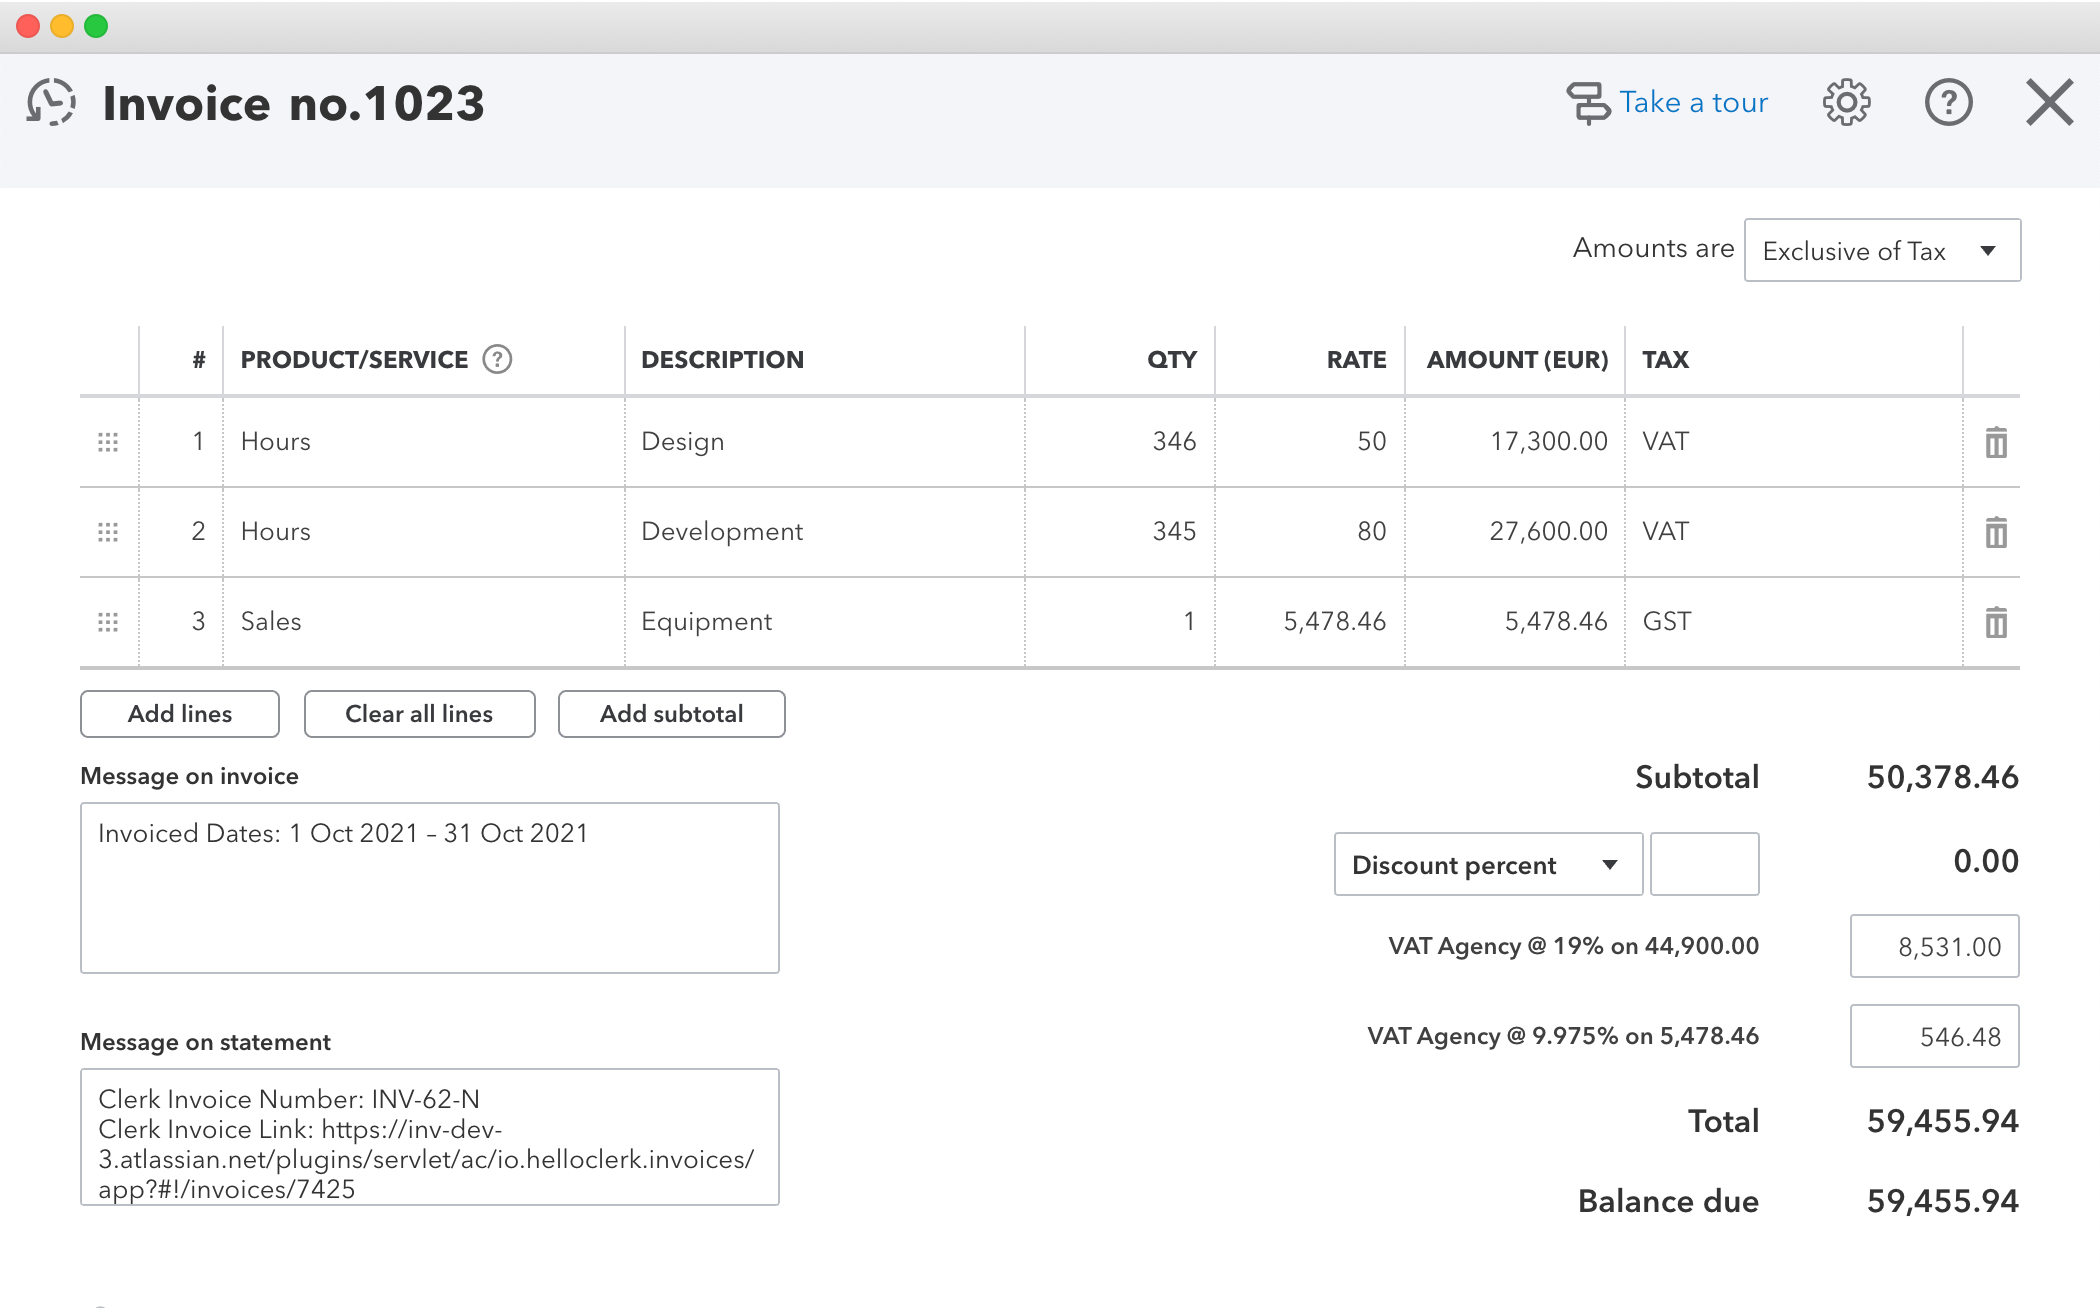
If tax is enabled for a specific invoice in the QuickBooks, QuickBooks requires that tax should be set for each invoice line. For that reason, if at least one invoice line in Clerk doesn’t have valid QuickBooks tax specified, the entire invoice will be exported as non-taxable.
Note
Setting Invoice Currency
QuickBooks can work in single and multi-currency modes. Each mode has its own specific points, that you need to take into account.
QuickBooks Single Currency Mode
In this mode, QuickBooks ignores the Clerk Invoices currency and always applies the home currency of your QuickBooks company.
QuickBooks Multi-Currency Mode
In this mode, QuickBooks requires that invoice currency should match the currency this client pays you with:
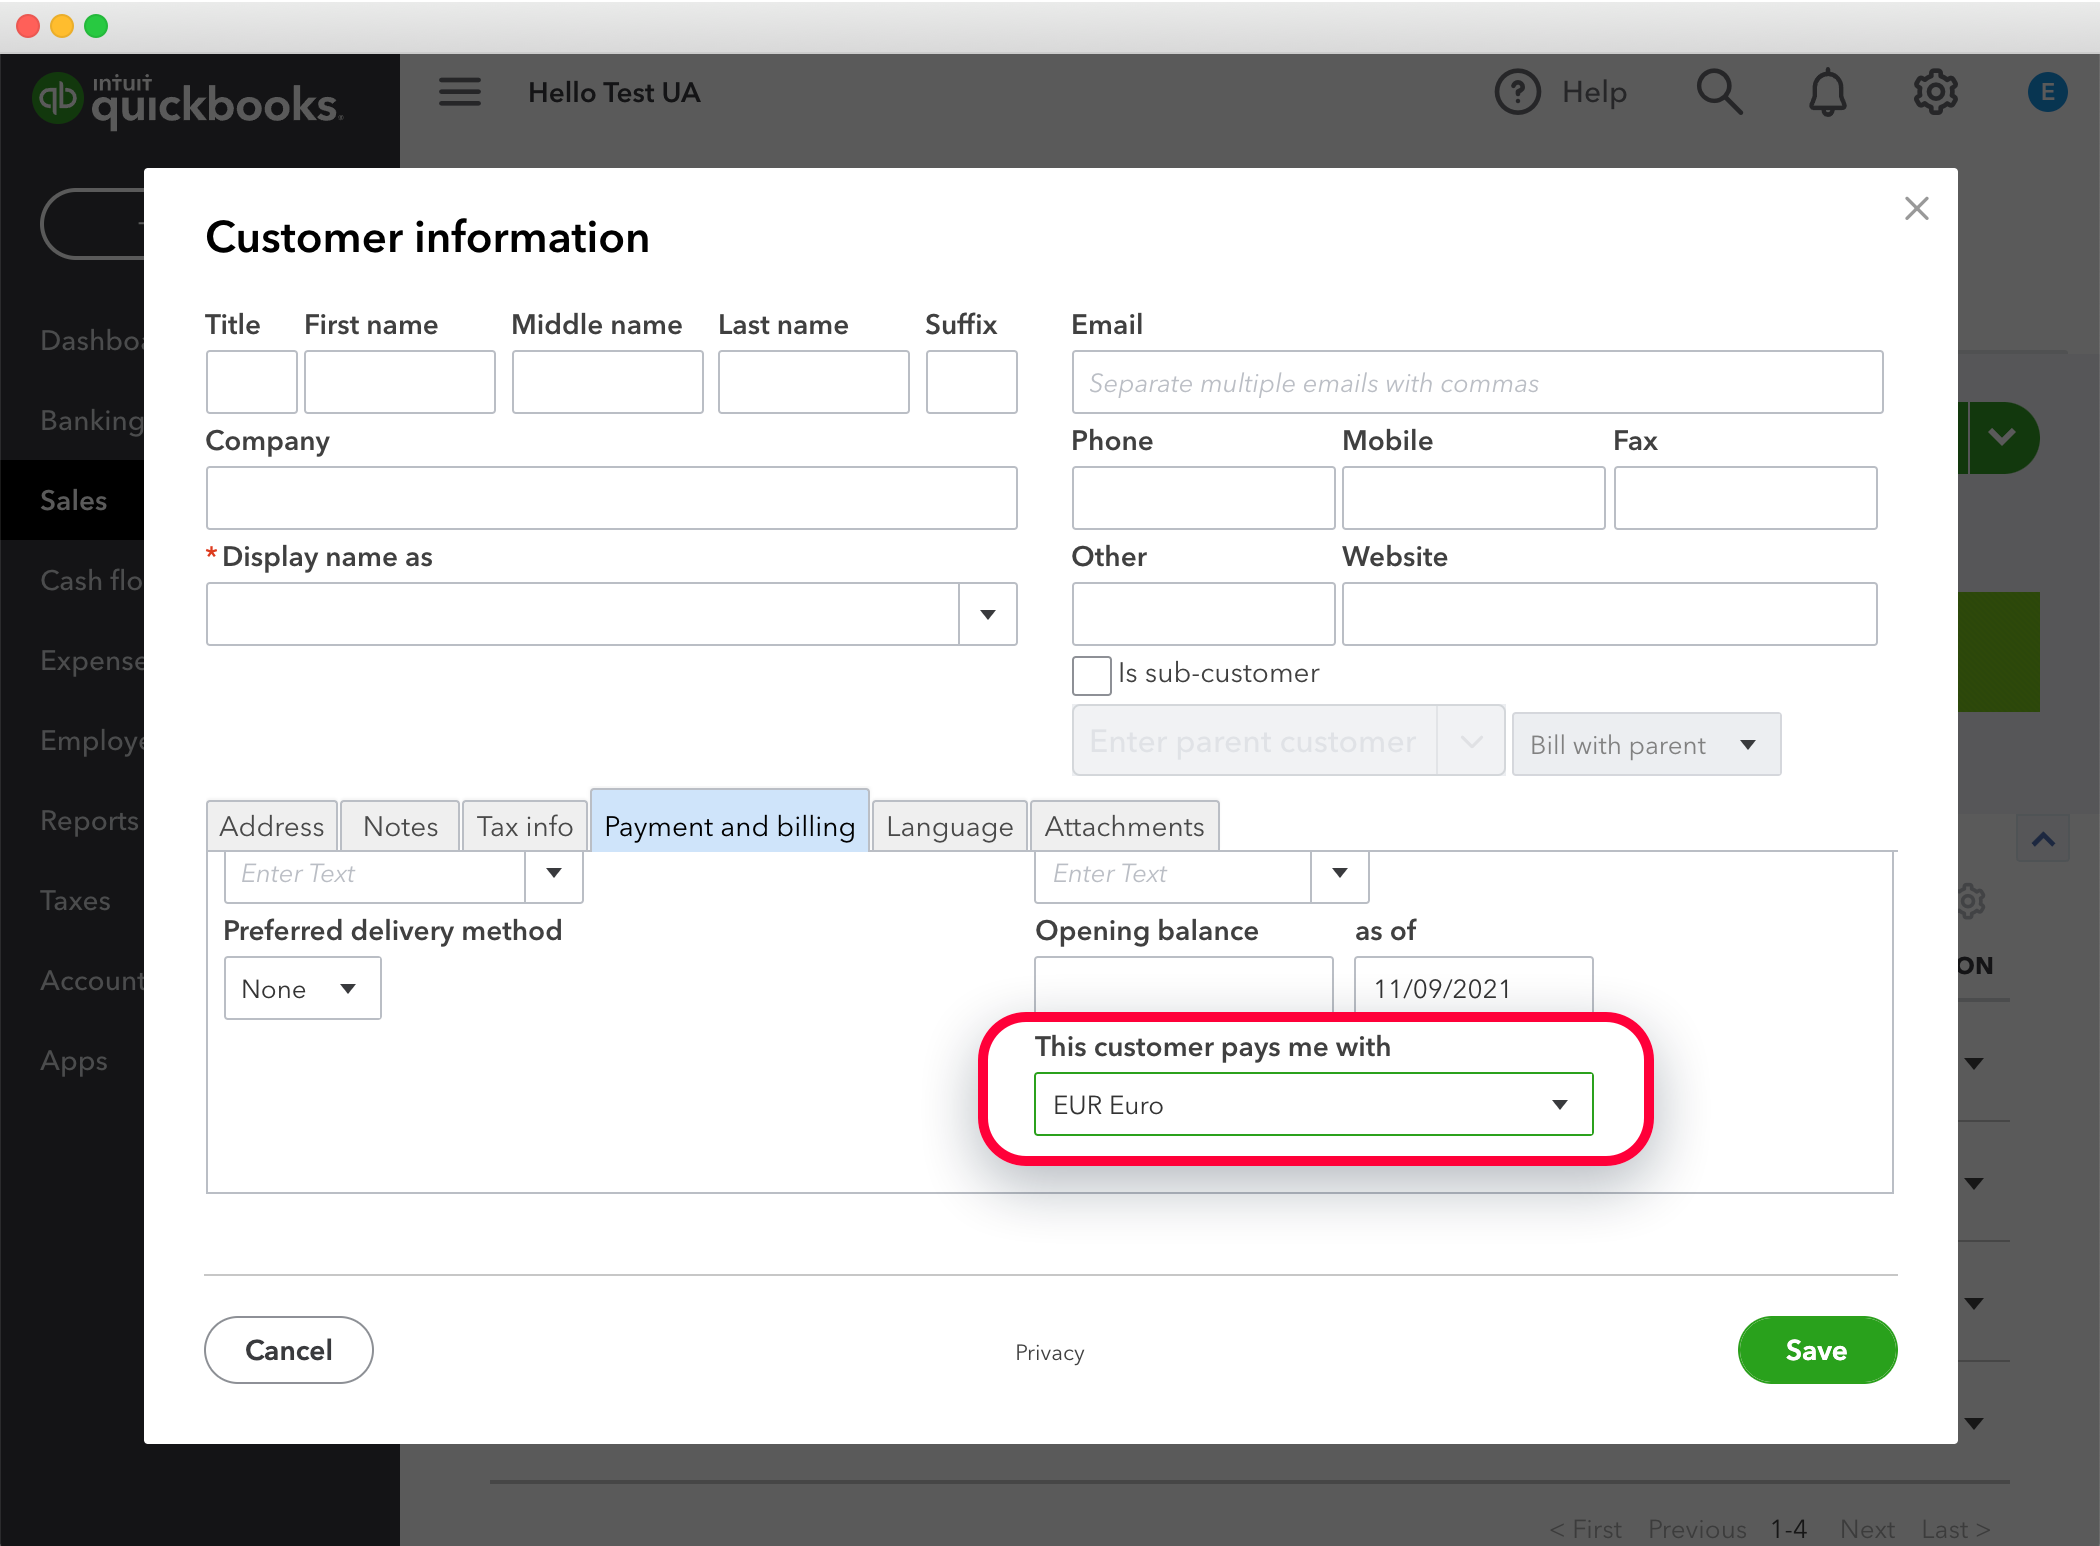
So, the invoice currency in Clerk should always match the client’s currency in QuickBooks. Otherwise, QuickBooks will return a validation error.
Applying Discounts
Clerk discounts work in a more complex way, so they are not exported to QuickBooks.
Automatic and Manual Sync Modes
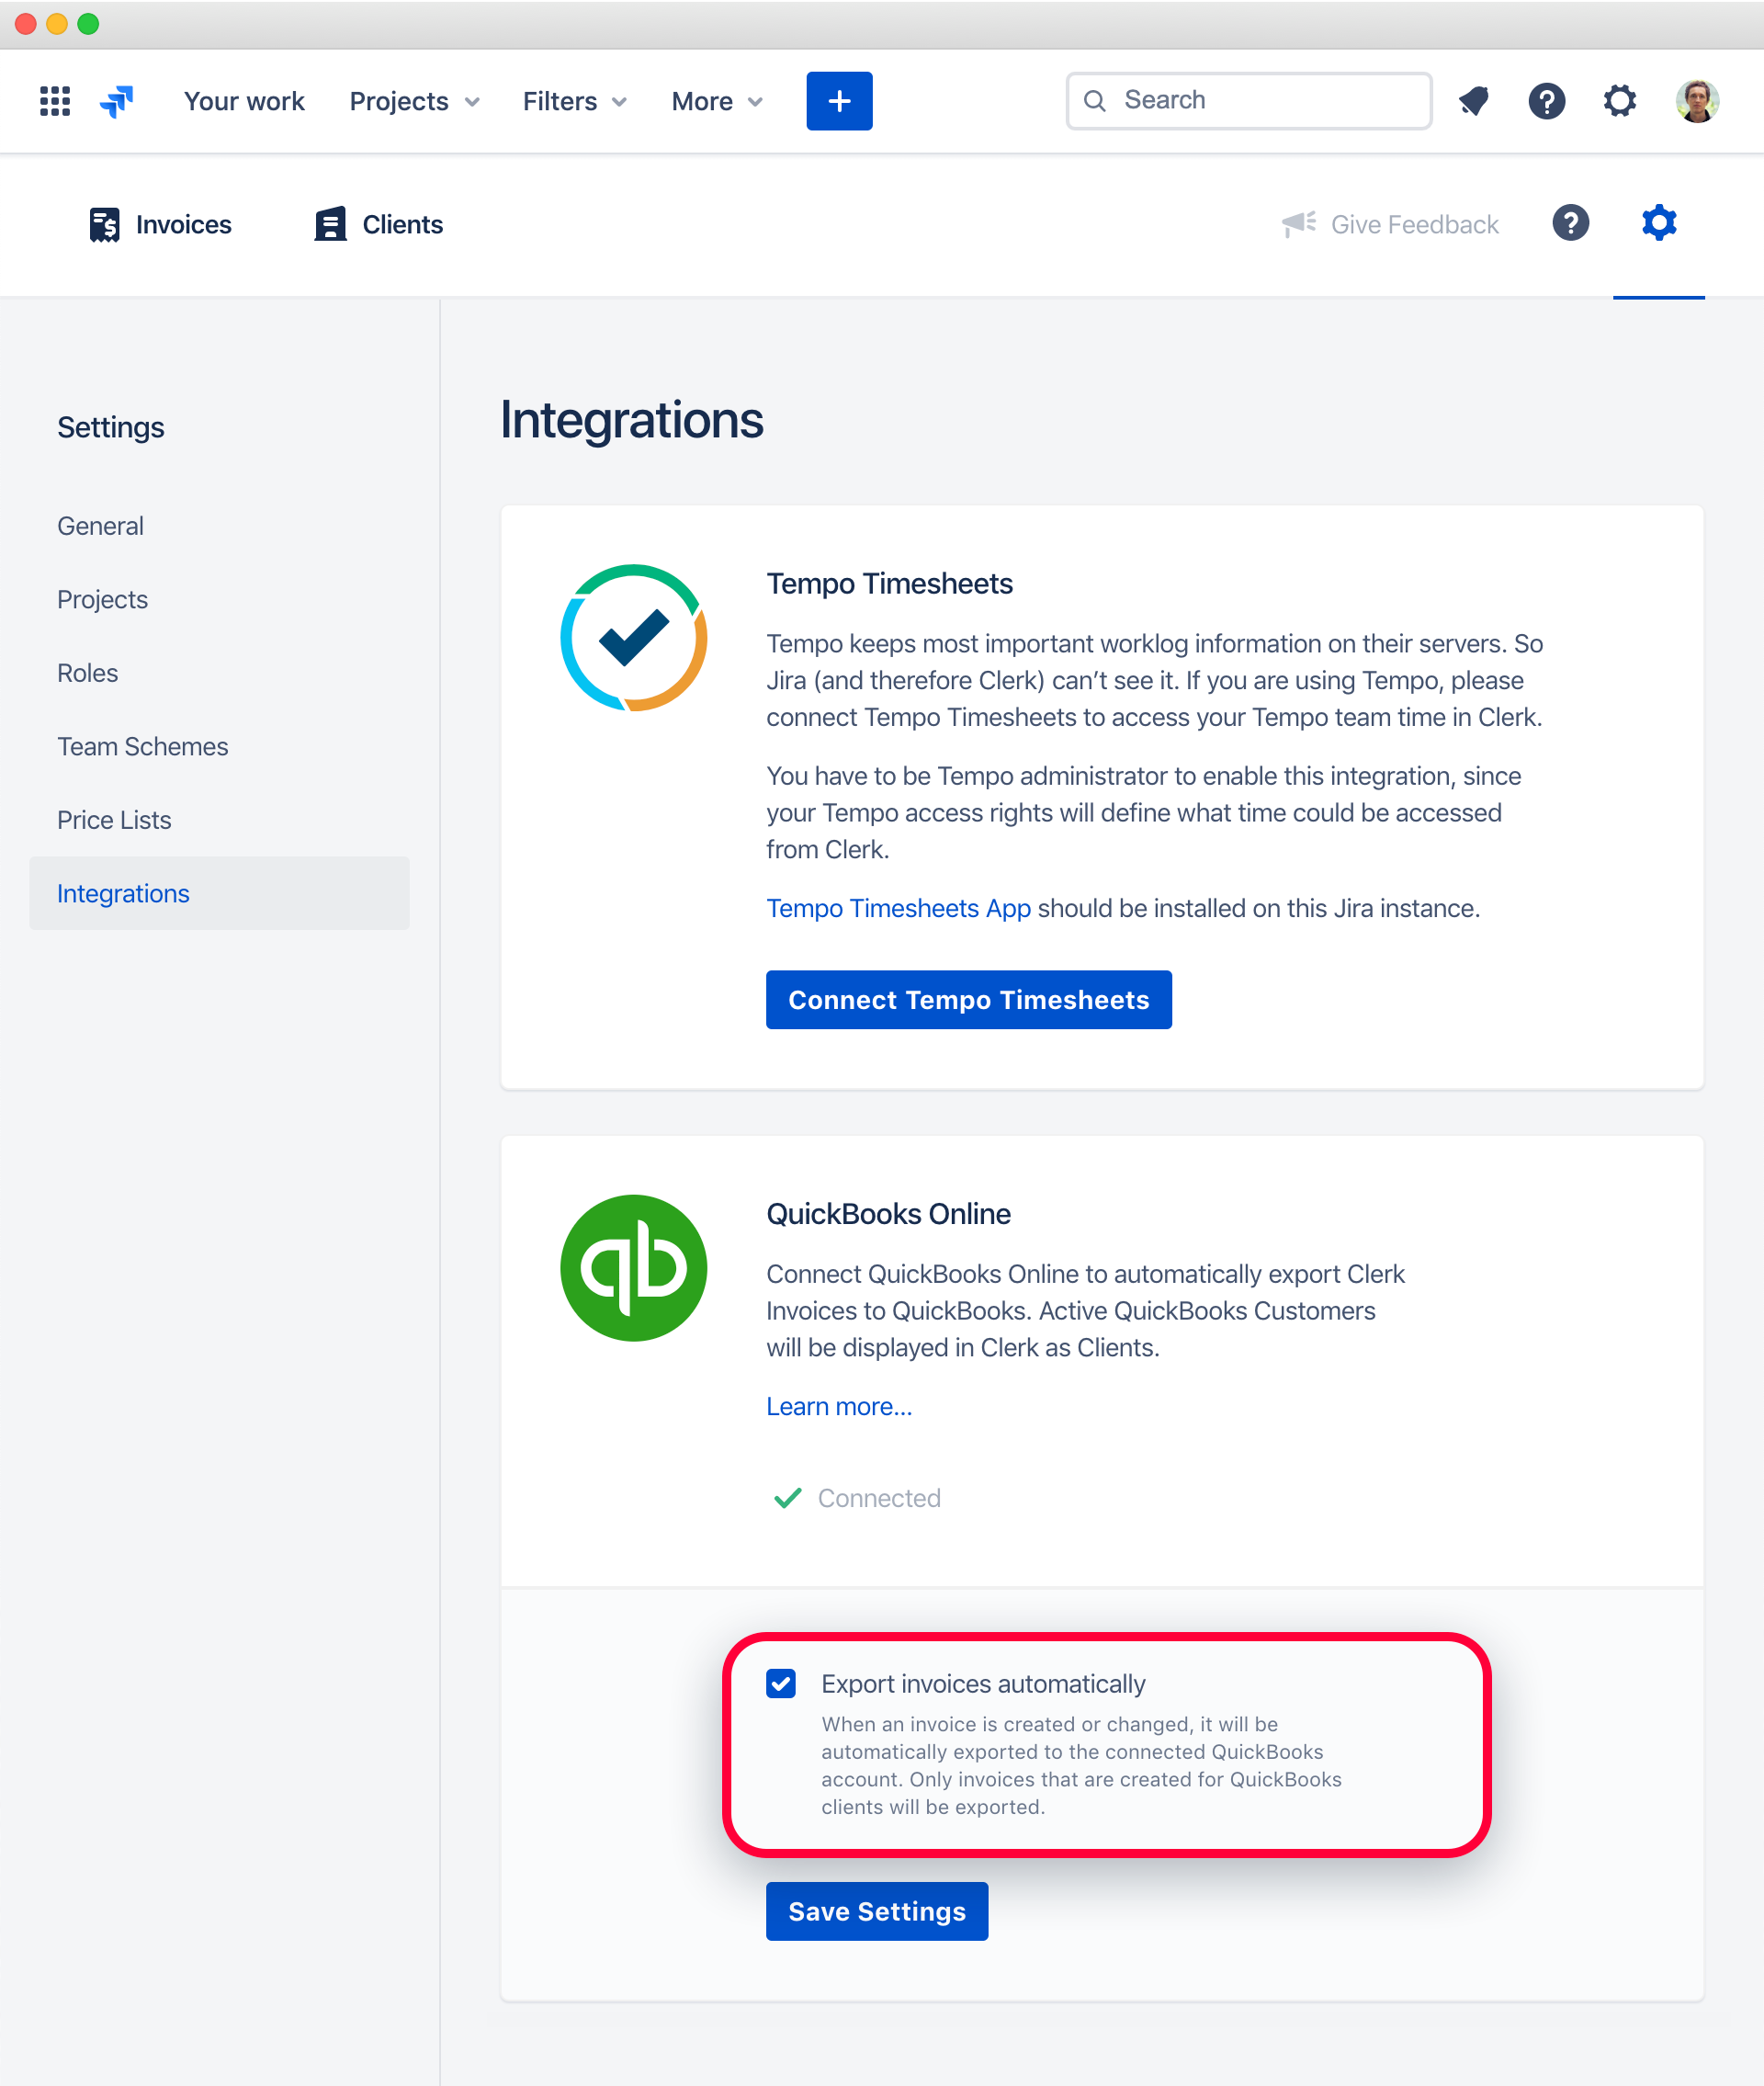
By default, Clerk Invoices automatically syncs all created or updated invoices with QuickBooks. Sync works for invoices that belong to QuickBooks clients only. To enable manual sync (that is available via the Export menu of a specific invoice), please go to Settings ▸ Integrations and uncheck “Export invoices automatically”:
Exporting Time Reports
If you have Show Time Reports to Clients enabled in the related invoice layout settings, time reports will be automatically attached to the QuickBooks invoice as PDF files.
Disabling QuickBooks Online Integration
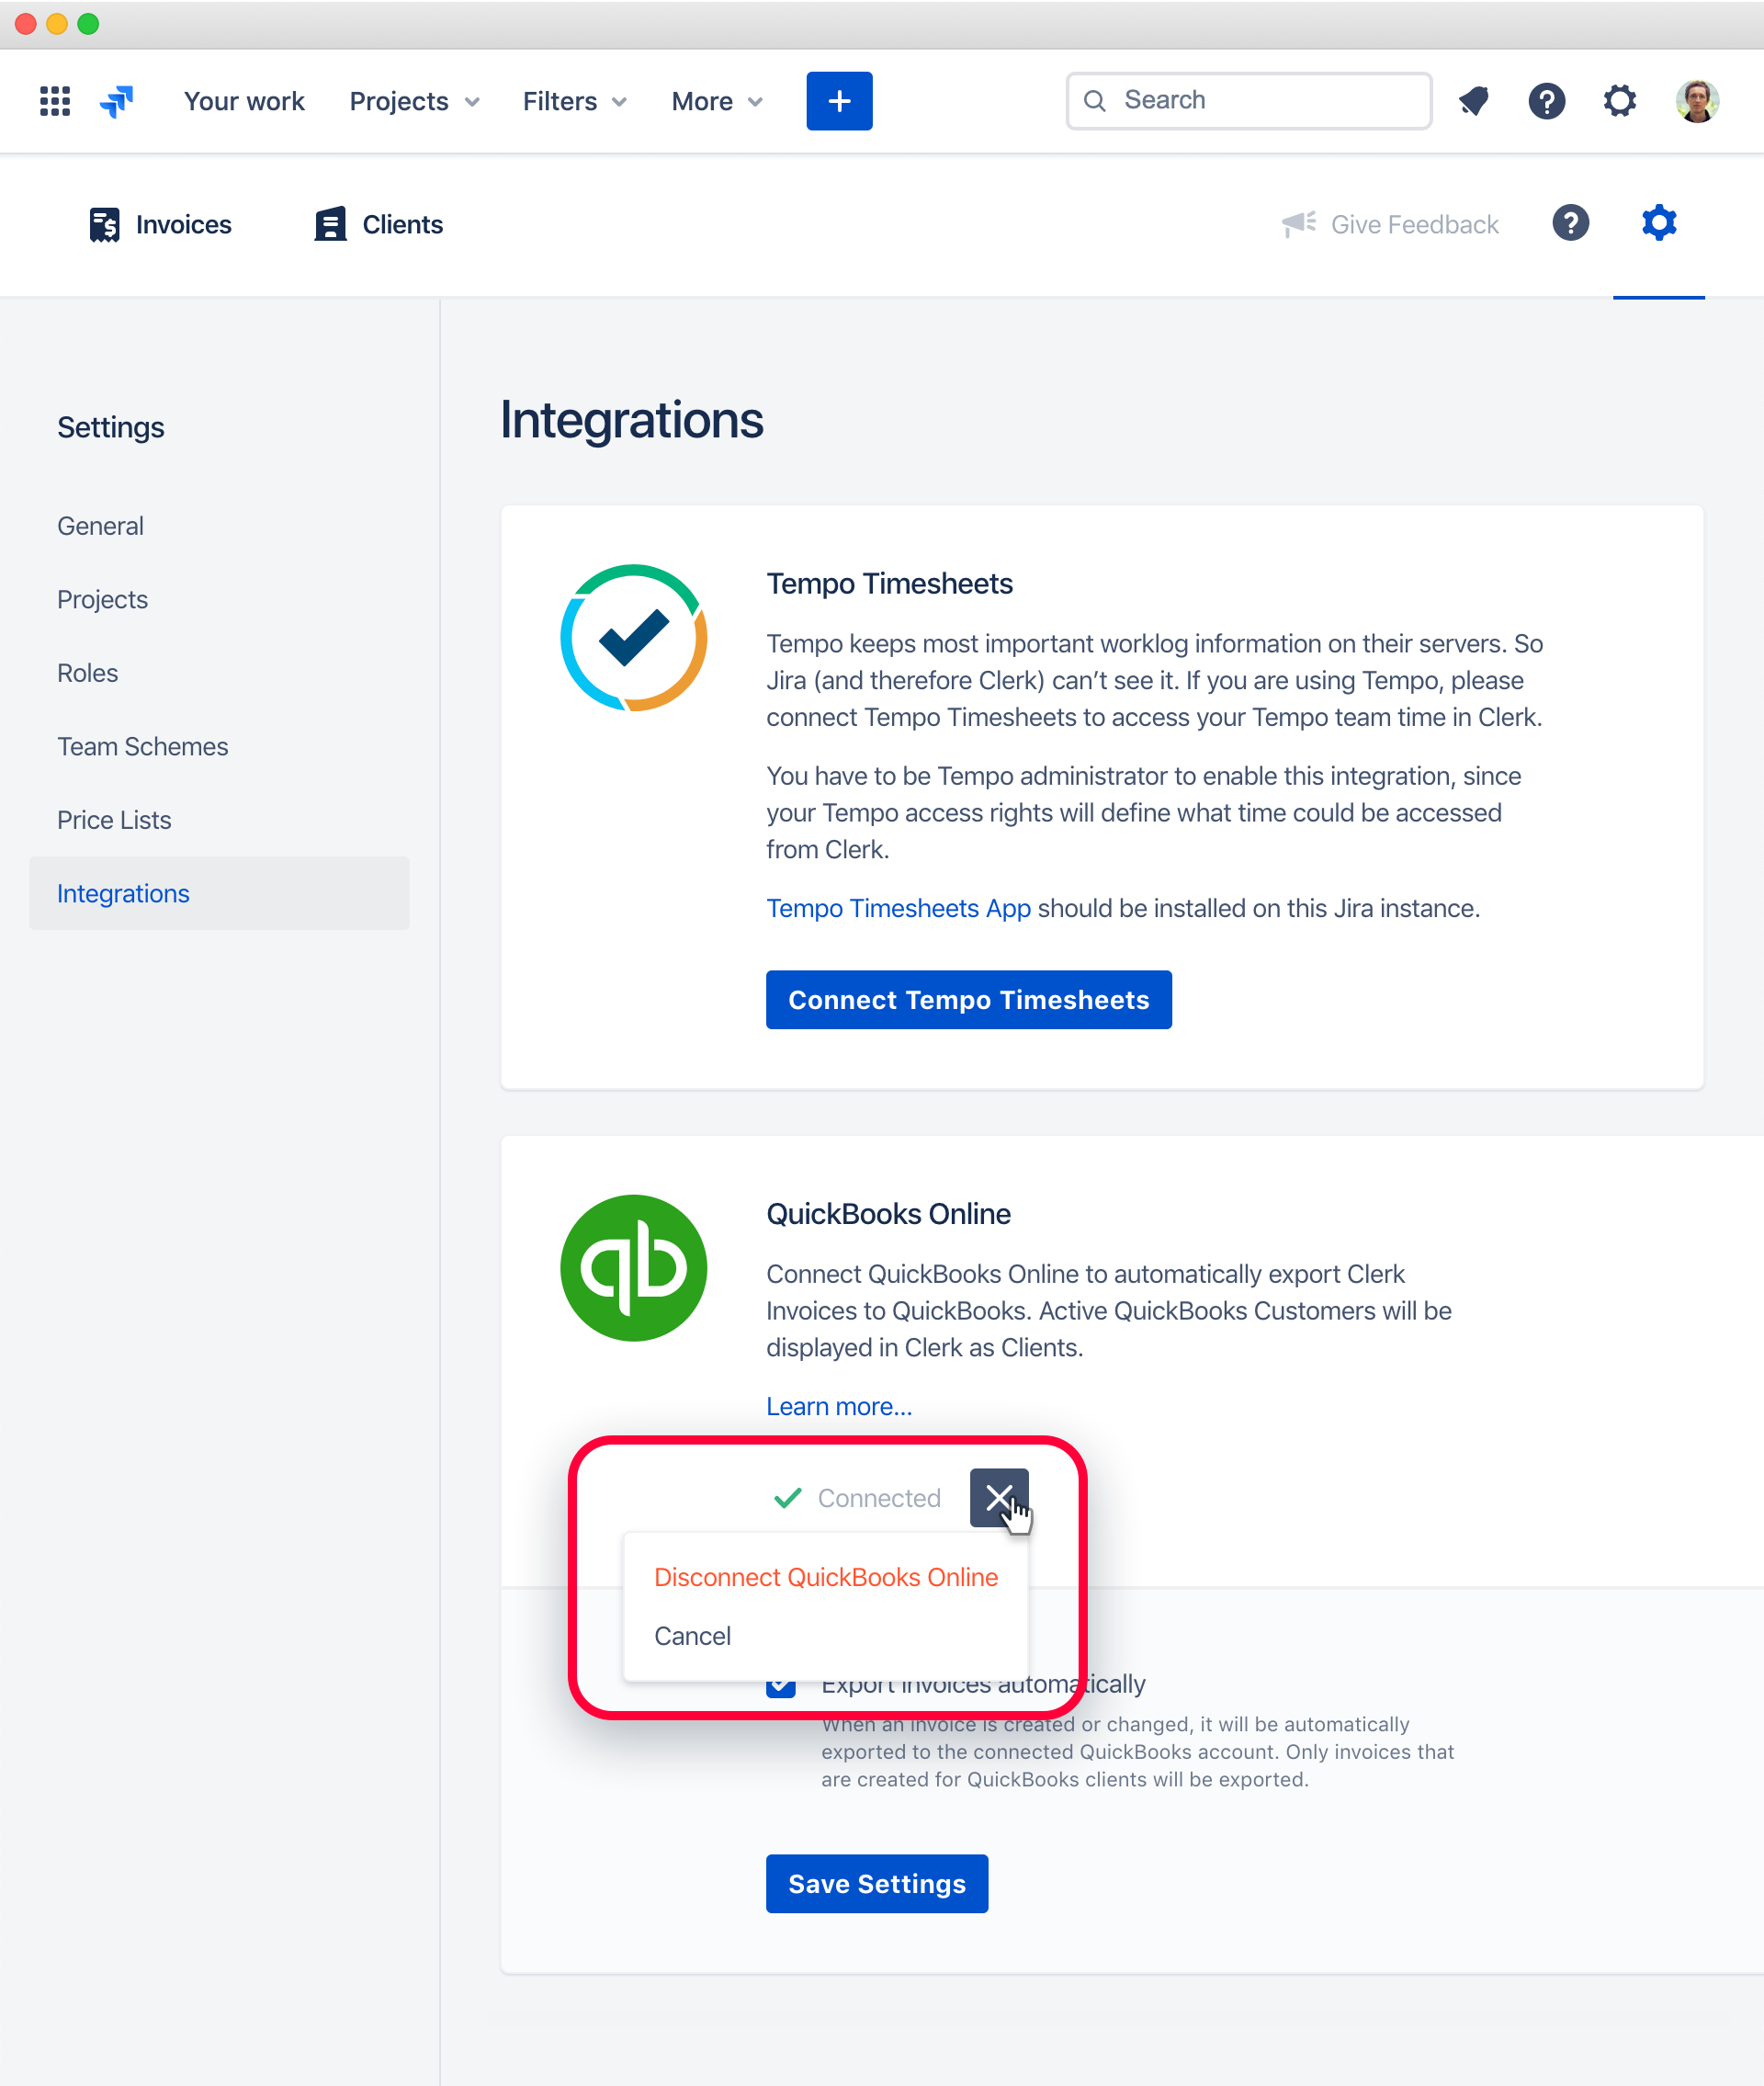
To disable QuickBooks Online integration, open Clerk Invoices app in your Jira instance, go to Settings ▸ Integrations and click the red cross icon to disconnect QuickBooks Online:
We would be happy to hear your feedback about QuickBooks integration. Please let us know if something is missing!