Creating Invoices Manually
🍿 Related Video Tutorials
In this article, we will quickly show how you can manually create invoices in Clerk on real-life examples. Other Help Center articles will explain this information in more details.
Let’s go!
Finding Projects to Be Invoiced
Let’s imagine that we use time and materials payment model to charge clients. November 2020 is over, and we want to create invoices for the work done.
Let’s open Clerk Invoices app, navigate to the November 2020 and build monthly time report:
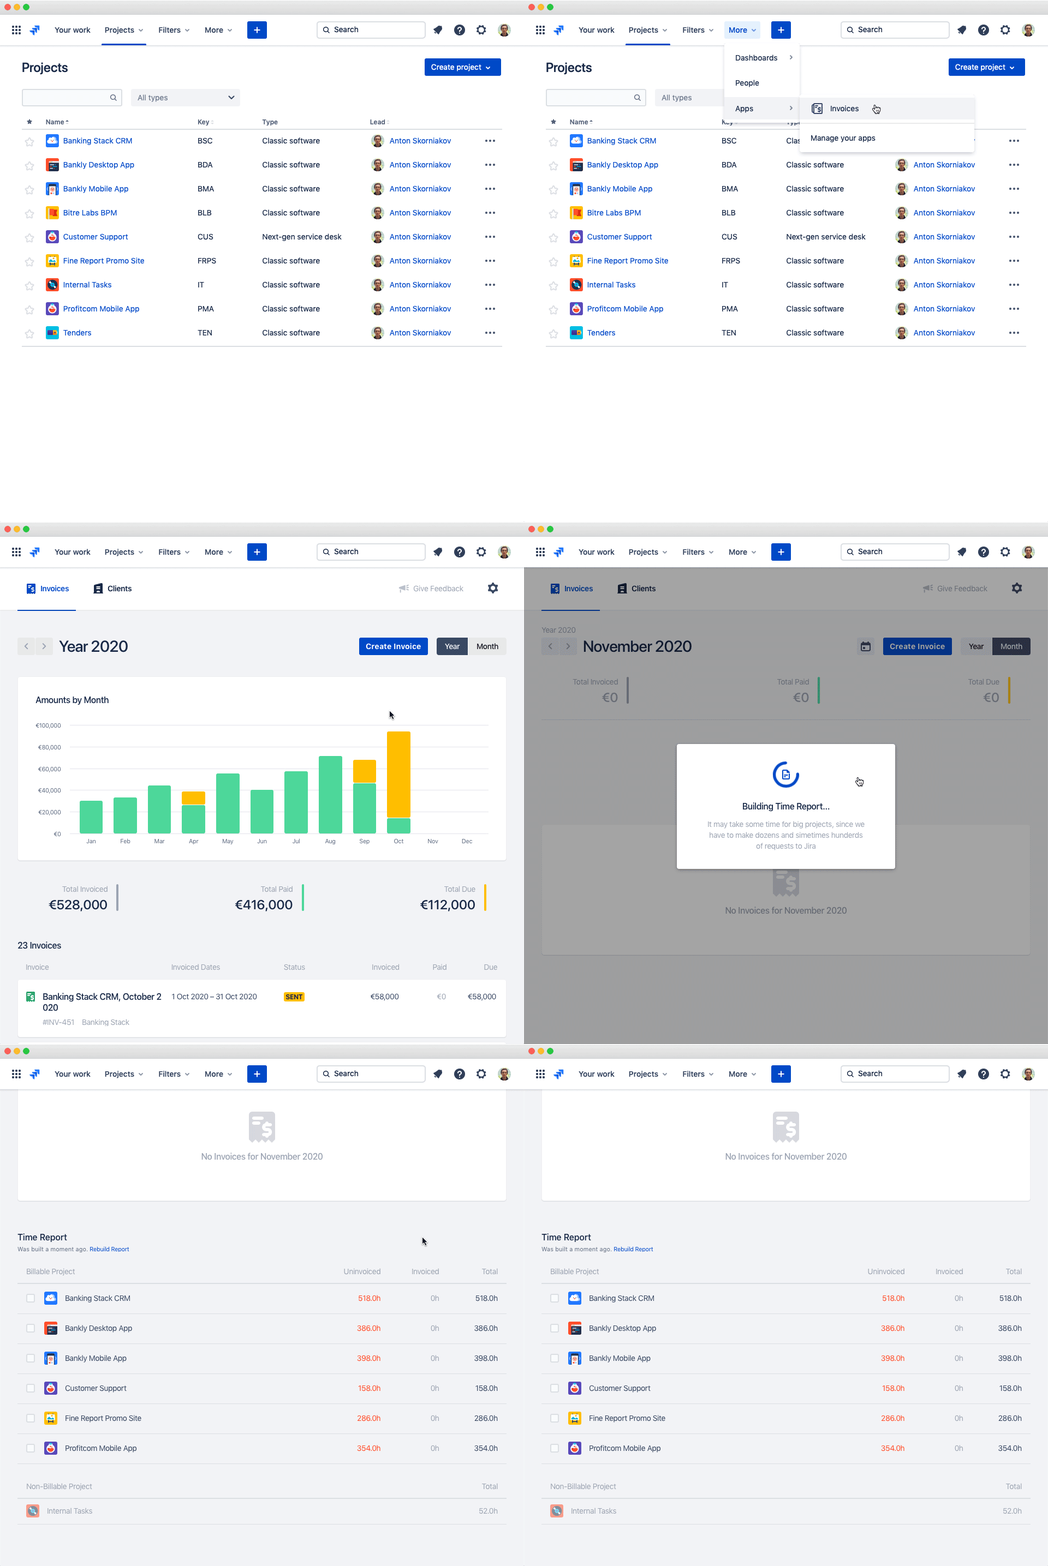
We see that the projects “Bankly Mobile App” and “Bankly Desktop App” that belong to one client have uninvoiced hours. So we mark them by ticks and create invoice with these projects:
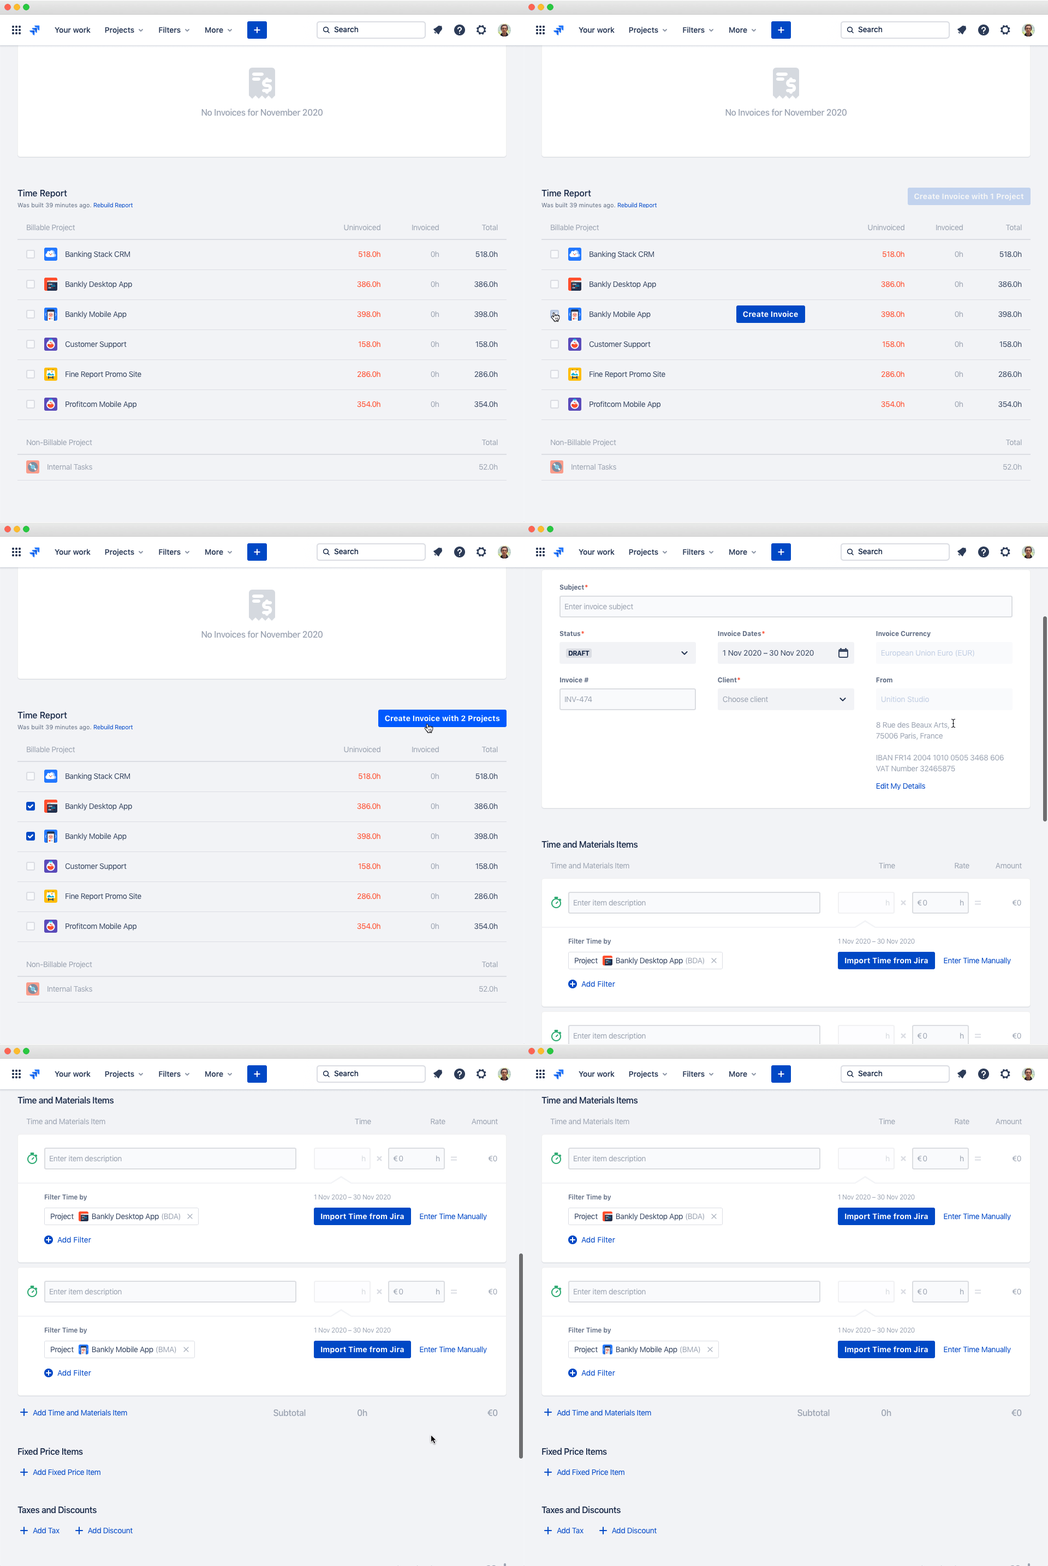
Creating Invoices
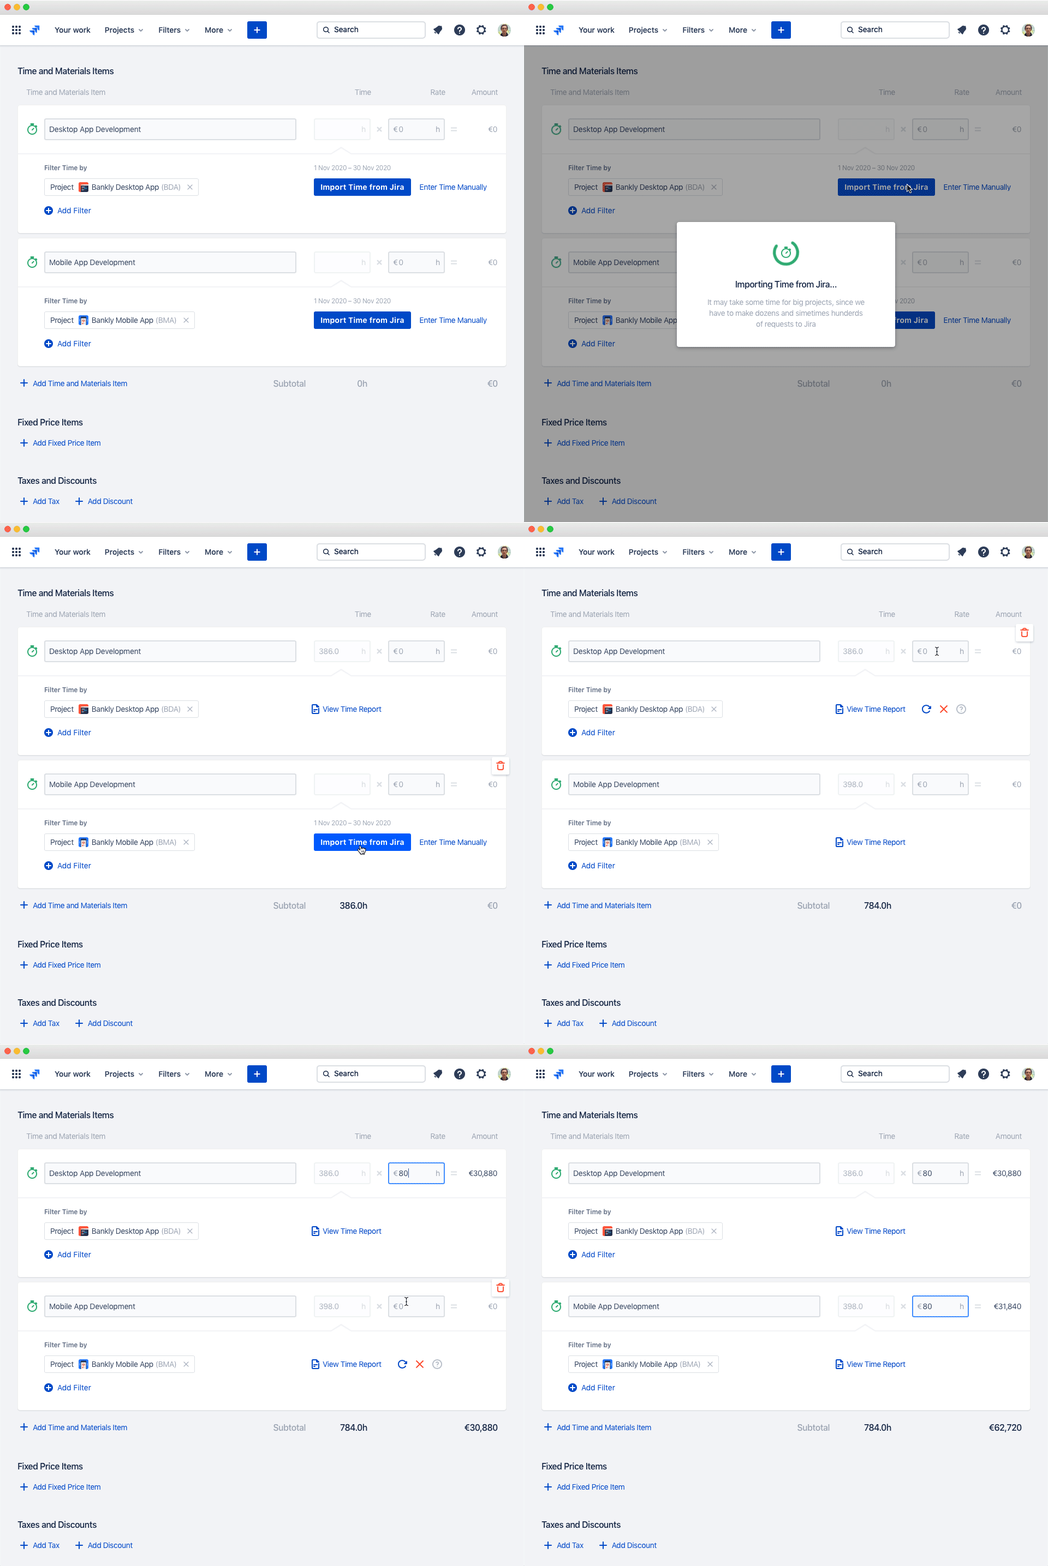
Now we have the invoice with two time and materials items. Every item has a time filter by the project that we have selected on the previous step. So only the time that belongs to these projects will be imported from Jira. And Invoiced Dates field defines the date range that will be used for import.
Let’s import time for these projects and set hourly rates:
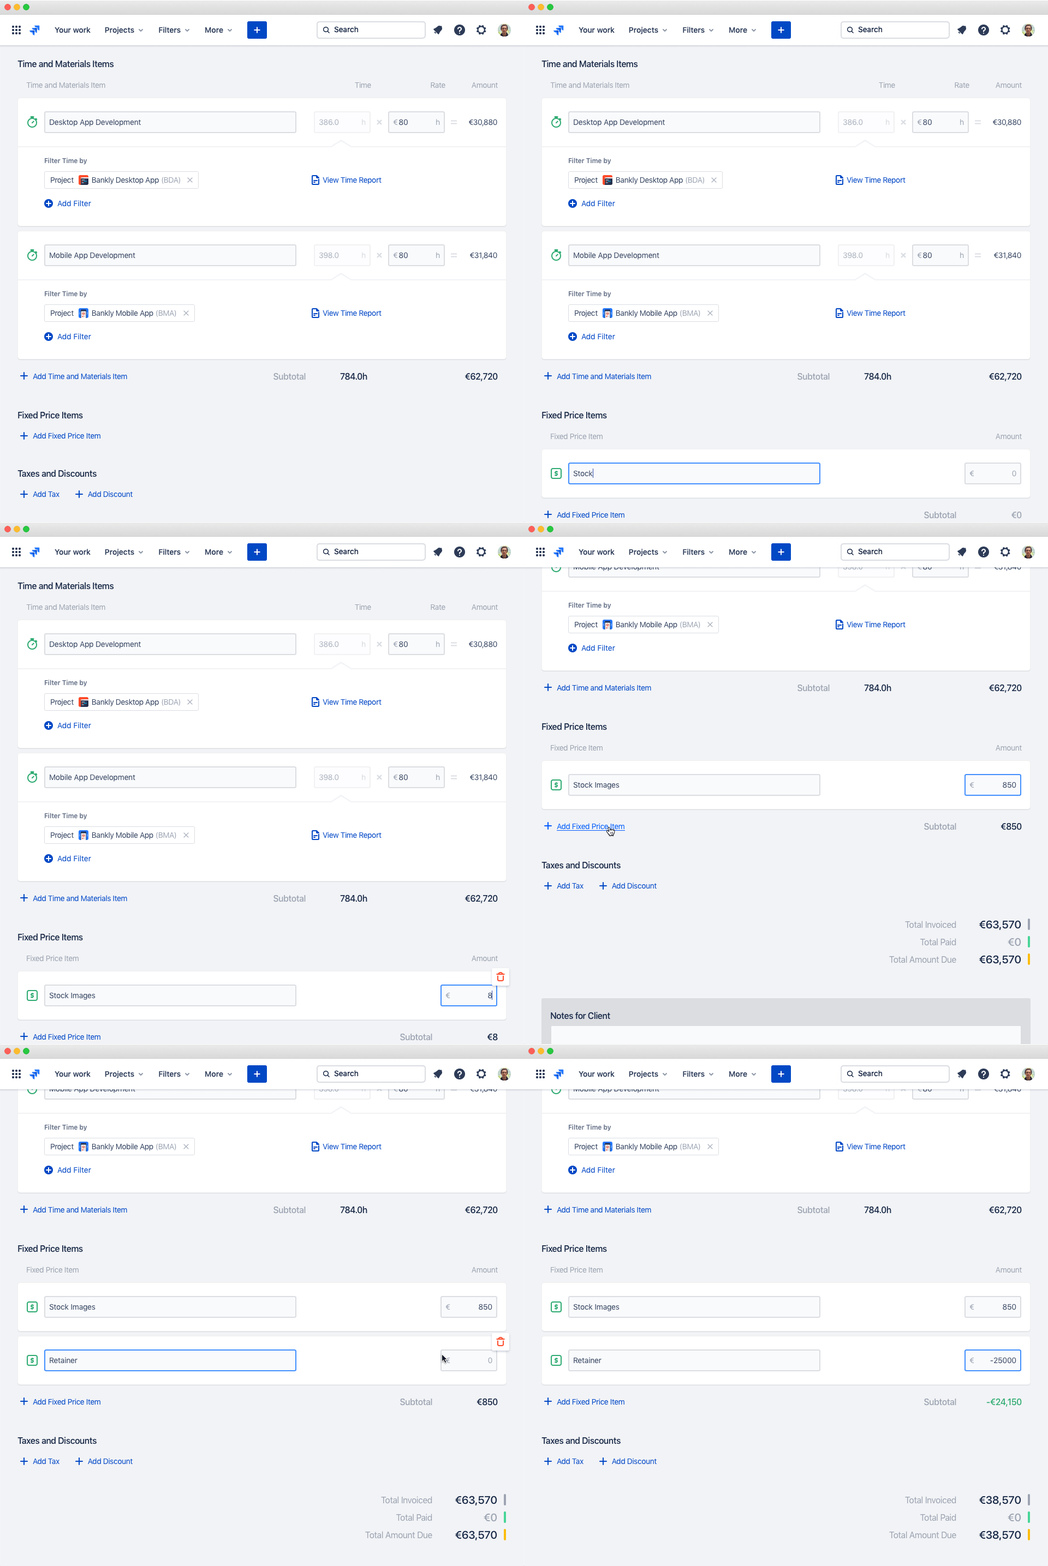
Let’s assume that we have bought stock images for the client. And the client has made an upfront payment for November. Let’s put these amounts in fixed price items of our invoice:
Plus we have an agreement that we will make a 10% discount in November. And since we pay VAT, we should include tax in the invoice:
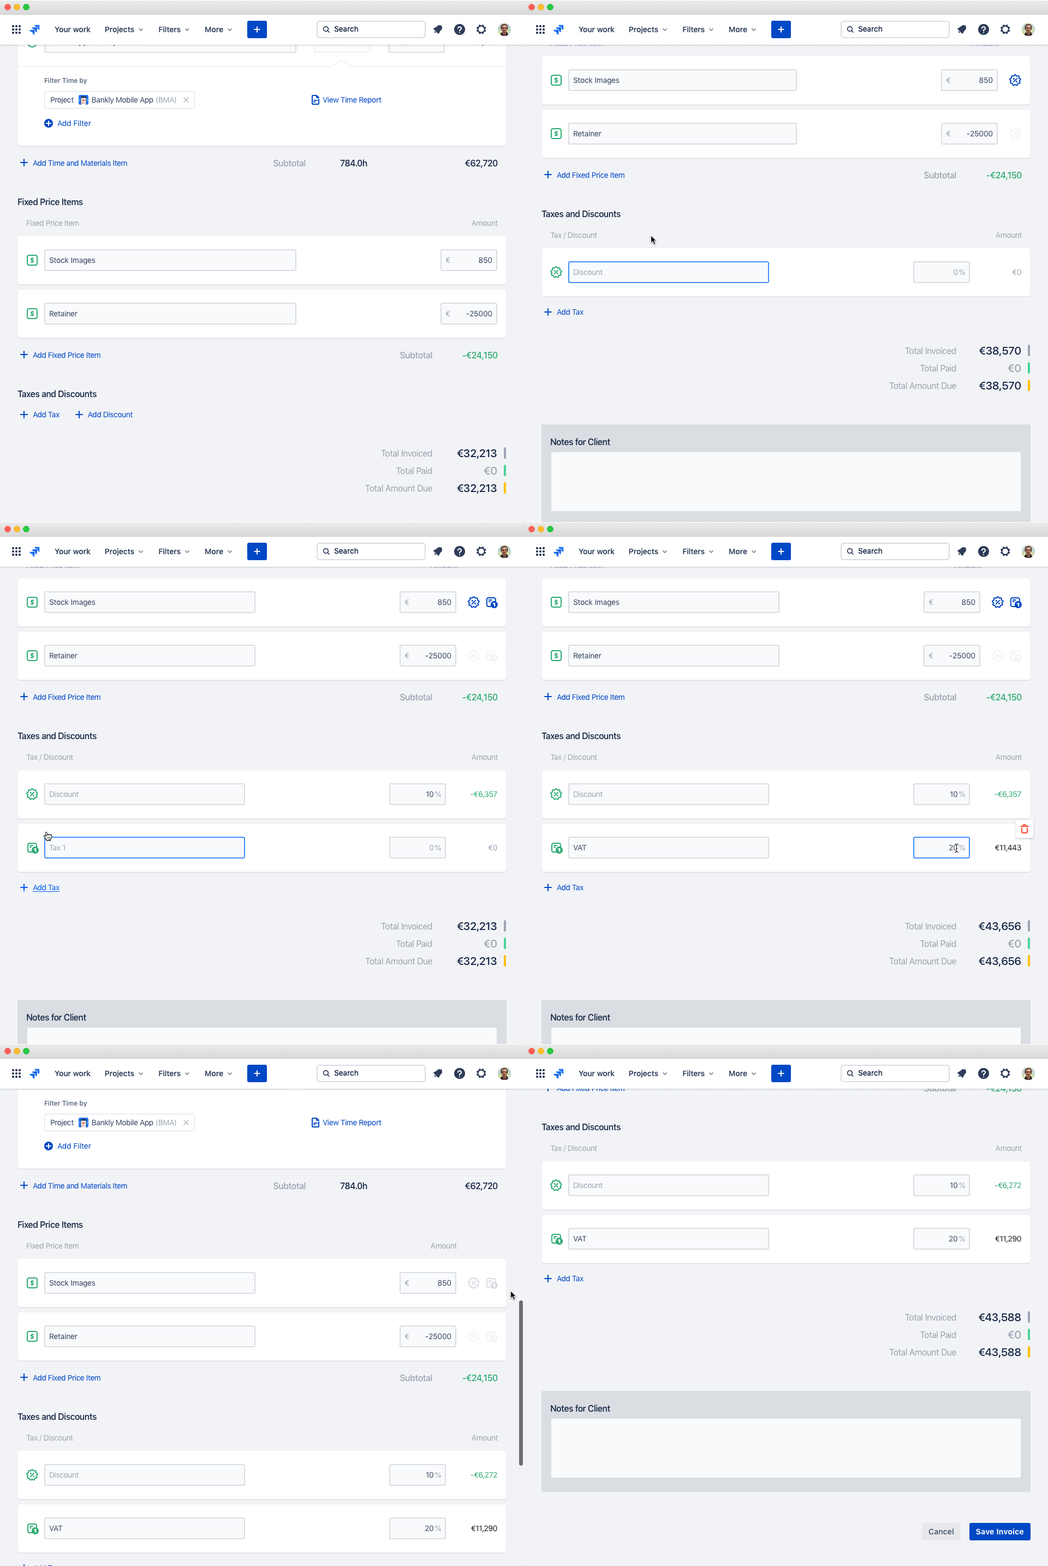
Now we can save our invoice!
Sending Invoices to Clients
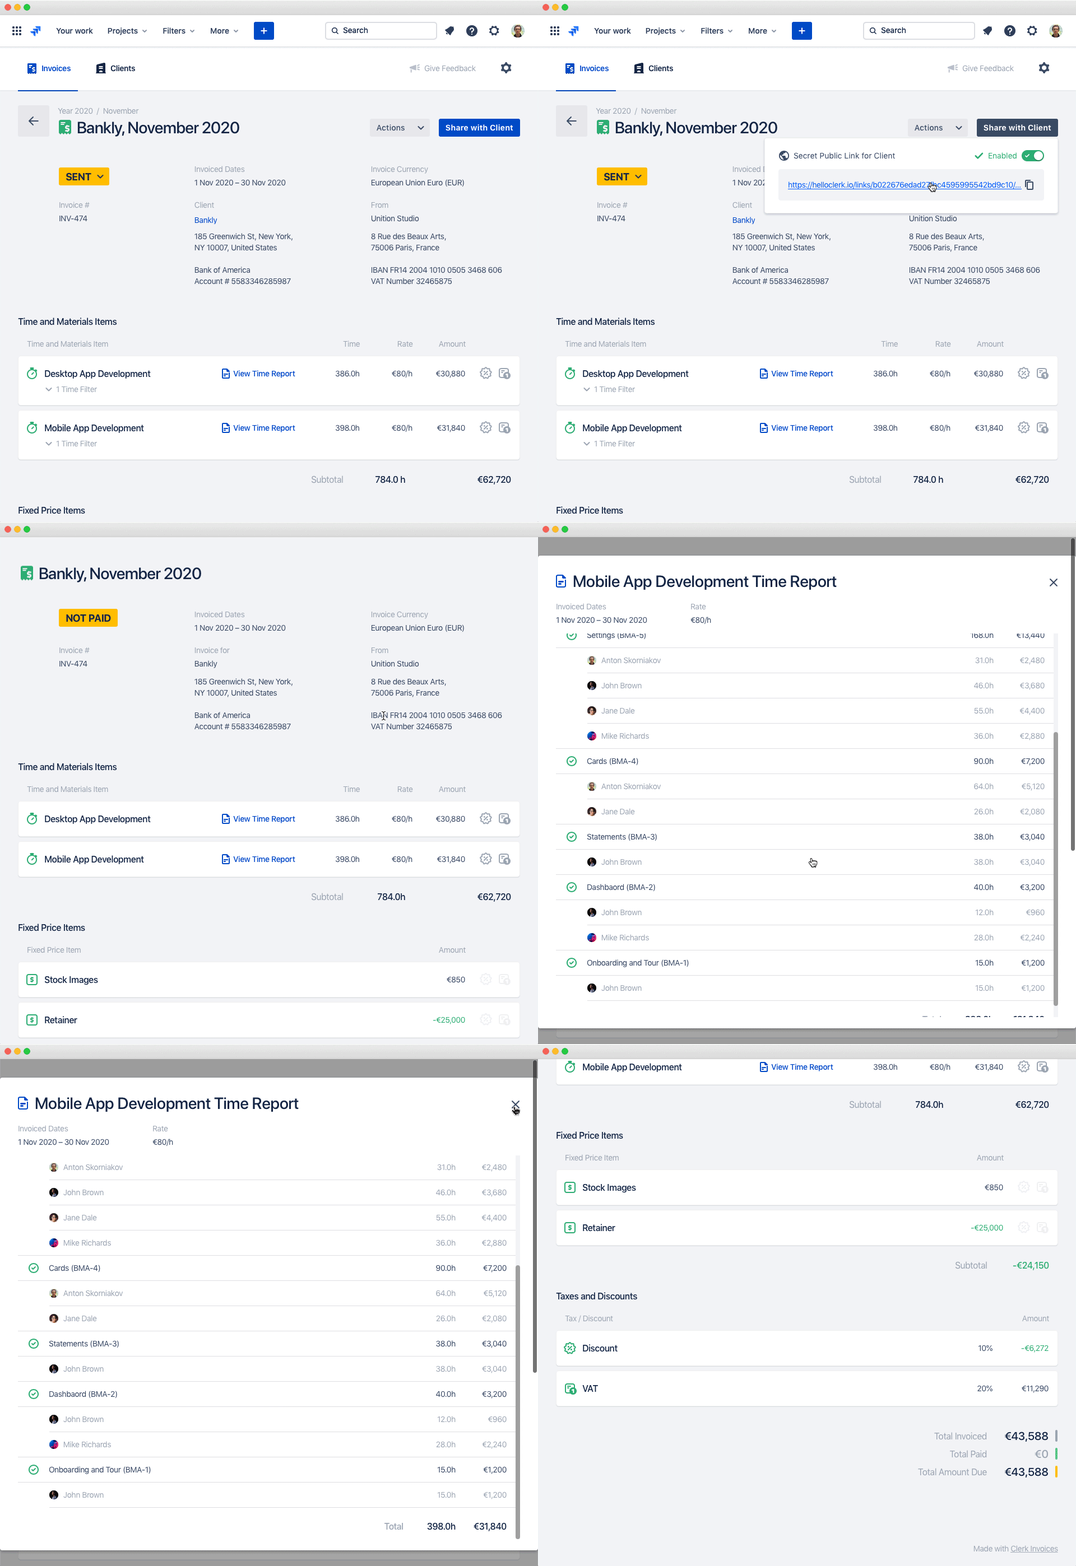
To send our invoice to the client, we can enable an invoice secret link or send the invoice in PDF or CSV format.
The client could see detailed time and cost reports that are automatically generated by Clerk:
Now you know how to manually create invoices in Clerk! Let’s see how you can automate this process using Invoice Generator in the next article.

